Zombie Titans All Four Titans Ranked
Kit breakdowns, siege roles, and when to unlock each mech in the Hangar.
Zombie Titans ships exactly four playable mechs. Mastering their kits matters more than chasing unconfirmed codes. This page expands the Tier List Hub with ability lists, role advice, and Scrap priority for Bulldog, Volt, Mammoth, and Mantis. Use it beside Titan Builds and Beat Behemoth when you plan Hangar spend after the October 2026 launch.
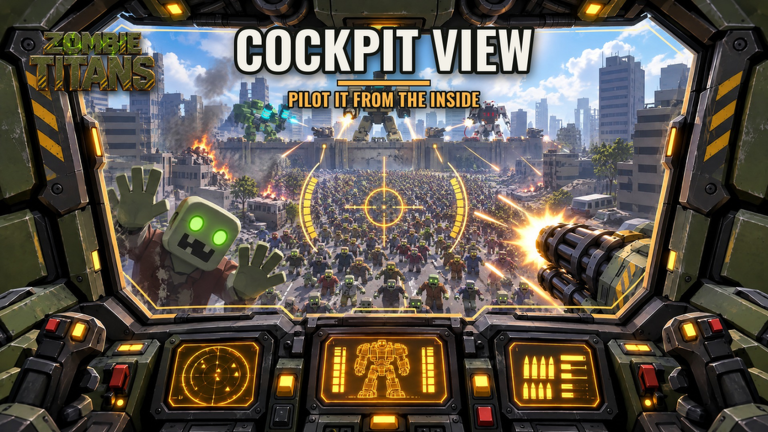
Remember the siege rhythm: March (establish wall control), Surge (mixed ground + flyers), Behemoth (boss check). Flying threats - Screechers, Gasbags, Carriers - punish ground-only lobbies. Toggle cockpit view while piloting whenever you need tighter aim on sky targets.
Volt - S tier (flyer king / beginner friendly)
Kit: chain-lightning arc gun | lightning strikes | Tesla field | EMP pulse
Volt is the default recommendation for new OMG pilots and for any lobby dying to air units. The arc gun chains through packed March waves; lightning strikes and Tesla field create denial zones during Surge; EMP pulse disrupts dense flyer clumps and buys the wall repair time. Volt’s flyer clear rating is the highest in the game, and splash forgiveness keeps beginners from whiffing every Gasbag.
Play tips
- Hold mid-wall angles where lightning can see both lane approaches and sky lanes.
- Save EMP for Carrier spikes or overlapping Screecher flocks - not random March trash.
- Pair with a Mammoth so Behemoth HP still melts while you own the sky.
Scrap priority: arc gun stability -> Tesla uptime -> EMP cooldown -> armor. Volt is the best single-Titan investment if your friends already bring raw boss DPS.
Mammoth - S tier (Behemoth DPS anchor)
Kit: siege cannon | mortar barrages | carpet bombs | siege ram
Mammoth exists to end fights. Siege cannon and mortar barrages chunk elites; carpet bombs clear clustered Surge packs; siege ram is a commitment tool for Behemoth windows or emergency wall peels. Behemoth DPS is Mammoth’s identity - coordinated teams slot at least one every serious clear.
Play tips
- Pre-aim mortar patterns on Behemoth arena markers before the phase starts.
- Do not tunnel the boss while Carriers drop adds unchecked - call for Volt help.
- Siege ram is not a panic button into friendly fire; communicate before charging.
Scrap priority: cannon damage -> mortar capacity -> bomb radius -> ram survivability. Mammoth is S-tier overall but only A for pure beginners who ignore flyers.
Bulldog - A tier (wall hold specialist)
Kit: twin gatlings | rocket pods | swarm missiles | ground slam
Bulldog is the March stabilizer. Twin gatlings shred chaff; rocket pods and swarm missiles punish bunched zombies; ground slam resets melee climbers on the wall face. Wall hold scores S even though overall tier sits at A because flyer tools lag behind Volt. For Scrap farming on easier cycles and for players who prefer aim-down-sights simplicity, Bulldog is excellent.
Play tips
- Sweep gatlings along the wall base; let missiles finish deep packs.
- Ground slam when climbers stack - not on cooldown the moment one zombie touches metal.
- In Surge, glance up often or ask a Volt to cover Carriers while you hold ground.
Scrap priority: gatling sustain / overheat -> missile count -> slam cooldown -> mobility. Bulldog pairs well with Volt in duo queues.
Mantis - B tier (melee high skill)
Kit: twin scythes | blade dashes | leap strikes | berserk
Mantis rewards movement masters. Blade dashes and leap strikes create burst windows; berserk multiplies melee uptime into terrifying elite damage. The tradeoff is unforgiving positioning: dash into a Behemoth slam or away from the wall and you become a spectator. Flyer clear is the weakest of the four, so Mantis pilots must trust teammates on Screechers and Gasbags.
Play tips
- Berserk only when heal/repair support or personal defensives are ready.
- Use leaps to collapse on priority ground elites, then dash back to wall-safe space.
- Practice cockpit view for precise scythe tracking without losing map awareness.
Scrap priority: dash charges -> berserk duration -> scythe damage -> survivability. Unlock Mantis after Volt/Bulldog/Mammoth basics fund your Hangar.
Comparative cheat sheet
| Titan | Best job | Weak job | Overall |
|---|---|---|---|
| Volt | Flyer clear, beginner queues | Pure single-target greed | S |
| Mammoth | Behemoth DPS, heavy Surge | Solo sky defense | S |
| Bulldog | Wall hold, March farming | Carrier duty | A |
| Mantis | Skilled melee burst | Flyer clear, new pilots | B |
Draft examples
- Learning lobby: Volt + Bulldog + Mammoth + flex
- Behemoth push: Mammoth + Mammoth + Volt + Bulldog
- Scrim / high skill: Mantis + Volt + Mammoth + Bulldog
Avoid four Mantis memes on public eight-player servers unless everyone accepts wipe risk.
Progress path after rankings
- Finish Getting Started so Hangar navigation is muscle memory.
- Follow upgrade routes on Titan Builds.
- Drill boss phases with Beat Behemoth.
- Track prestige goals on Hall of Fame.
- Recheck this page after notes on the Updates Hub.
Four Titans is a small roster - depth comes from role discipline, not from waiting on a fifth frame. Rank Volt and Mammoth at the top for most queues, keep Bulldog as your reliable wall dog, and graduate into Mantis when dashes feel like second nature. Spend Scrap with intent, cover the sky, and the Behemoth falls.
Frequently Asked Questions
Quick answers for Zombie Titans pilots.
Which Titan should I unlock first?
Volt for flyer safety and beginner forgiveness, or Bulldog if your lobbies die to ground swarms on the wall.
What does Volt's EMP pulse do in practice?
It is best saved for Carrier spikes or dense Screecher/Gasbag clumps during Surge, not spent on light March trash.
Why is Mantis only B tier?
High skill ceiling and weak flyer tools. Great in skilled hands, inconsistent for new pilots on public servers.
Do I need two Mammoths for Behemoth?
One well-upgraded Mammoth plus focused fire is often enough; two help on spongy weeks after HP buffs. Always bring flyer cover.
Where are full build paths?
See Titan Builds for Scrap upgrade orders and Beat Behemoth for phase-by-phase DPS checks.